 Ask About Our Discounts!
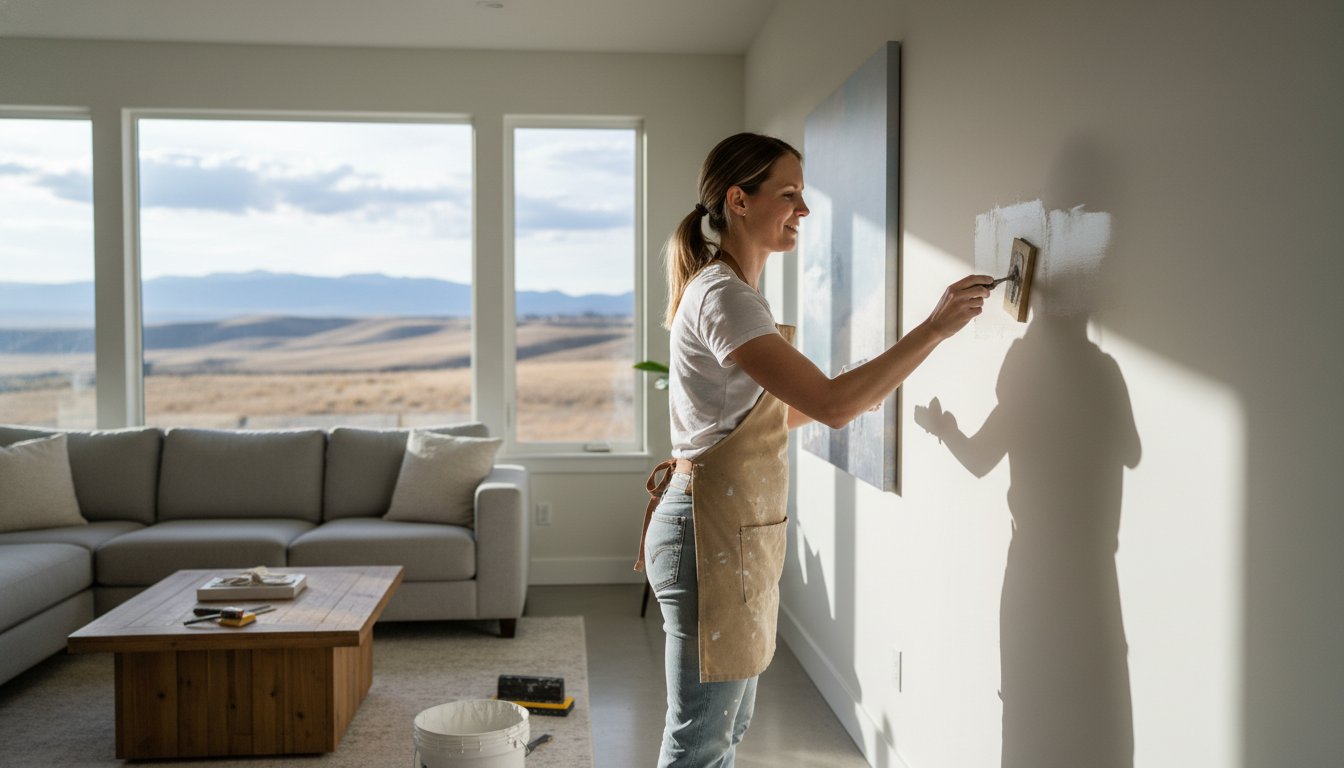
How to Fix a Hole in the Wall: A Highlands Ranch Homeowner’s Guide to Invisible Repairs
You’ve finally decided to move that heavy dresser, only to hear the unmistakable crunch of drywall meeting wood. It’s a frustrating moment that many homeowners face, but learning how to fix a hole in the wall Highlands Ranch residents can actually be proud of requires more than just a tub of spackle. We understand the fear of creating a “bulge” patch that stands out every time the afternoon sun hits it. Your home is your sanctuary, and a botched repair can feel like a blemish on the beautiful space you’ve worked so hard to curate.
We’re here to help you master the art of invisible repairs by focusing on the unique challenges of our Colorado climate. From the arid air that affects drying times to the specific knockdown and orange peel textures common in local neighborhoods, this guide provides professional techniques for a seamless finish. You’ll learn why those annoying nail pops keep appearing and how to achieve a perfectly smooth surface that blends into your existing décor. Whether you choose to tackle a small DIY project or decide it’s time to call in a conscientious craftsman for a complex texture match, we’ll ensure your walls reflect the care and quality your home deserves.
Key Takeaways
- Understand how Colorado’s arid climate and seasonal temperature shifts create specific drywall challenges like settling cracks and nail pops.
- Master the essential techniques for how to fix a hole in the wall Highlands Ranch homes often have, ensuring your repairs don’t stand out against existing textures.
- Select the right professional-grade materials, such as specific joint compounds and tapes, to ensure your repair stands the test of time.
- Learn the critical difference between a simple DIY patch and a complex restoration that requires the specialized touch of a local craftsman.
Identifying the Damage: Why Holes Happen in Highlands Ranch Homes
Every blemish on your wall tells a story of daily life. Perhaps a doorknob swung too wide during a busy morning, or a piece of furniture left a lasting impression during a move. Understanding how to fix a hole in the wall Highlands Ranch residents can feel proud of begins with a proper diagnosis of why the damage occurred. We approach every repair as an act of stewardship, ensuring your home remains a place of beauty and integrity.
To better understand the practical steps of this process, watch this helpful video:
Suburban construction from the 1990s and early 2000s, particularly in the Westridge area, often presents unique issues like nail pops. These occur when the wooden studs behind the drywall shrink, causing the fasteners to protrude through the surface. In basement finishes, it’s essential to distinguish between a simple physical impact and water damage. If the area feels soft or shows yellowish staining, you’re likely dealing with moisture rather than a furniture ding, which requires a more comprehensive solution to protect your home’s health.
The Impact of Colorado Aridity on Your Walls
Our high-altitude desert environment is incredibly demanding on building materials. The low humidity causes framing lumber to contract and pull, which often results in the “Colorado Crack.” A foundational part of understanding drywall is recognizing that it’s a rigid surface attached to a living, moving wooden frame. Thermal expansion is the process where building materials expand and contract in response to the extreme temperature fluctuations common in Highlands Ranch. Because of this movement, seasonal cracks often reappear in the exact same spots every year as the climate shifts.
Neighborhood-Specific Settling Trends
Settling patterns vary based on the age and location of your neighborhood. Newer homes in Northridge are often still finding their footing, leading to vertical cracks above doors and windows. Established homes in Eastridge have likely finished their initial settling, but they remain affected by the expansive bentonite clay soils found across the Front Range. This soil swells when wet and shrinks when dry, putting constant pressure on your foundation. If a “simple hole” is actually a diagonal crack wider than a quarter-inch, it may be a sign of structural settling rather than a surface-level accident. We believe in providing honest assessments so you can make the best decision for your home’s longevity.
The Pro’s Toolkit: Essential Materials for an Invisible Repair
Quality tools are the silent partners of a conscientious craftsman. When you set out to learn how to fix a hole in the wall Highlands Ranch homeowners often find that the difference between a visible “hump” and a seamless surface lies in the materials chosen. We believe that every repair is an opportunity to restore the harmony of your living space; using the right equipment is the first step in that transformation. While it’s tempting to use whatever is on hand, professional-grade results require a specific set of tools designed to work with, rather than against, your home’s structure.
Your toolkit should include the following essentials:
- Taping Knives: You need both a 6-inch knife for initial application and a 10-inch knife for feathering the edges.
- Sandpaper: A range of grits is vital. Use 120-grit for knocking down high spots and 220-grit for the final, smooth finish.
- Tape: While mesh tape is easier for beginners to apply, paper tape provides a stronger bond that resists the structural shifting common in the Front Range.
- Mud Pan: A stainless steel pan allows you to keep your compound clean and manageable.
Joint Compound Selection for the Dry Colorado Air
Our low-humidity environment changes the rules for “mudding.” Pre-mixed all-purpose compound is convenient for small dings, but it shrinks significantly as the water evaporates in our dry air. For deeper holes, Denver pros often prefer “setting-type” compound, also known as hot mud. This powder-based product hardens through a chemical reaction rather than simple evaporation, which minimizes shrinking and allows you to apply multiple coats in a single day. To keep your compound from drying out too quickly in the tray, mix only what you can use in fifteen minutes and keep a damp sponge nearby to wipe your tools clean between applications.
Patching Kits vs. Traditional Methods
For holes larger than a nail pop but smaller than a doorknob, a metal-backed adhesive patch offers a sturdy foundation. However, for a truly invisible finish, many experts rely on the “California patch.” This technique uses a piece of drywall larger than the hole, with the gypsum removed from the edges to leave a paper “flange” that acts as its own tape. It’s a disciplined approach that creates a thinner profile on the wall. Regardless of the method, always wear a dust mask and eye protection. Sanding creates fine particulates that can linger in your home, and protecting your health is as important as protecting your walls. If the scope of the damage feels overwhelming, seeking expert drywall repair can ensure your home’s aesthetic is restored with precision and care.

Step-by-Step: Fixing Small to Medium Holes Like a Pro
Mastering how to fix a hole in the wall Highlands Ranch homeowners can be proud of is a process that rewards patience and a steady hand. We view every repair as a restoration of your home’s character, requiring a disciplined approach to ensure the patch remains undetectable. When you’re determining how to fix a hole in the wall Highlands Ranch houses often require a gentle touch to handle the varied textures and dry conditions found in our community.
Step 1: Preparation is the foundation of integrity. Use a sharp utility knife to cut away loose gypsum and any frayed paper from the edges of the hole. If you leave torn paper behind, it will absorb moisture from the mud and create unsightly bubbles that ruin the finish. Step 2: Apply your patch or tape. Using your 6-inch knife, spread a thin, even layer of joint compound over the area. Press your tape into the mud firmly, then wipe away the excess with a single, smooth stroke. You want just enough mud to bond the tape to the wall without creating unnecessary bulk.
Step 3: Feathering the edges. This is the most critical phase for avoiding the “bump” effect. By extending the compound well beyond the damaged area, you trick the eye into seeing a flat surface. Step 4: Observe the 24-hour rule. While our dry Colorado air helps mud dry quickly on the surface, the deeper layers need time to fully dehydrate and shrink. Rushing this step often leads to hairline cracks once you apply paint. Step 5: Execute the final sanding. Once completely dry, use your 220-grit sandpaper to buff the edges until they vanish into the surrounding drywall.
The Art of Feathering
To achieve a professional result, switch to your 10-inch knife for the final coats of mud. Start from the center and pull outward, applying firm pressure on the knife’s edge that is furthest from the patch while maintaining zero pressure on the edge closest to the center. This technique creates a tapered edge that is impossible to see once painted. To create a truly invisible transition, your finished patch should be roughly three times larger than the original hole.
Sanding Without the Mess
Dust management is essential for maintaining a healthy home environment. Consider wet sanding by using a large, slightly damp sponge to smooth the edges of the dried compound; this eliminates the fine white powder that usually coats every surface. To ensure perfection, hold a work light at a low angle against the wall. This “raking light” will cast shadows on any tiny ridges or pits that need more attention. Finally, wipe the entire area with a clean tack cloth to remove any remaining debris before you begin the texturing process.
The Secret to the Invisible Finish: Texture and Paint
A perfectly smooth patch is only half the battle. To truly master how to fix a hole in the wall Highlands Ranch residents must conquer the challenge of texture matching. Whether your home features the subtle dimples of orange peel or the rustic ridges of knockdown, the goal is total visual integration. We see this process as more than just a repair; it’s an act of home stewardship that preserves the beauty of your living environment. Identifying your specific texture is the first step toward a successful repair:
- Orange Peel: Features small, rounded bumps that resemble the skin of a citrus fruit.
- Knockdown: A more architectural style with flattened splatters that create a variegated surface.
- Popcorn: A heavy, acoustic texture most commonly found on ceilings.
Aerosol texture sprays are a convenient choice for small repairs, but they require a specific technique. Always warm the can in a bowl of warm water for several minutes to ensure the internal pressure remains consistent. Never spray directly onto the wall without testing your pattern on a piece of cardboard first. Once the texture is applied, you must follow the “Prime First” rule. Joint compound is porous and will drink up your paint, leading to a dull spot known as “flashing.” A high-quality primer seals the mud and provides a uniform surface for your topcoat.
Mastering the Highlands Ranch ‘Knockdown’ Texture
Knockdown texture is a staple in many local homes. To achieve this look, spray your splatter and wait for it to lose its wet sheen, which usually takes about 10 to 15 minutes depending on the humidity. Use a wide, clean taping knife to gently “knock down” the tops of the splatters. You’re looking for a flat-top finish that matches the surrounding area. Be diligent about cleaning up any overspray from your baseboards or ceilings immediately with a damp cloth to maintain the integrity of your trim.
Painting for Total Disappearance
Color is important, but matching the sheen is the real secret to a disappearing act. Even the perfect color will stand out if the patch is glossier or flatter than the rest of the wall. When applying your final coat, use a “feathering” technique with a nearly dry roller to blend the new paint into the old. For more comprehensive advice on refreshing your home’s look, explore our interior painting Highlands Ranch guide. If you find that the repair is still visible after your best efforts, our team offers professional drywall repair and painting to restore your space to its original glory.
When to Call a Highlands Ranch Drywall Expert
While mastering how to fix a hole in the wall Highlands Ranch homeowners often find that certain projects exceed the scope of a standard DIY toolkit. We believe in the power of personal effort, but we also recognize that your home is a significant investment that deserves a flawless finish. Large holes, typically those greater than 6 inches, often require the installation of new drywall segments rather than a simple surface patch. This process involves cutting back to the center of the studs and ensuring structural support, a task that demands precision to prevent future sagging or cracking.
Ceiling repairs present a unique set of challenges that can be daunting for even the most dedicated homeowner. The physical toll of working overhead is significant, but the real difficulty lies in matching gravity-defying textures like knockdown or popcorn. Achieving a seamless blend on a horizontal surface requires a level of artistry and specialized equipment that few DIYers possess. Additionally, if you notice extensive cracking that extends from the corners of doors or windows, it may suggest foundation shifts that require a professional assessment before any cosmetic work begins.
We understand that Highlands Ranch families lead busy lives. When you evaluate how to fix a hole in the wall Highlands Ranch residents must often weigh the “Time vs. Quality” trade-off. Spending your entire weekend covered in dust only to end up with a visible patch can be deeply frustrating. Choosing a professional partner allows you to reclaim your time while ensuring a result that adds genuine value to your environment.
The Higher Impact Difference
We approach every project with the mindset of a conscientious craftsman. This means we don’t just fix the surface; we ensure a clean, dust-free job site that respects your family’s health and space. Our commitment to social responsibility and community-minded service drives us to treat your home with the same care we would our own. For complex projects that require more than a simple patch, our professional drywall repair Highlands Ranch services provide the technical expertise needed for a total restoration.
Ready for a Transformation?
If you’re ready to move from a minor repair to a complete home refresh, we’re here to help. We offer free estimates for homeowners in Highlands Ranch and the greater Denver area, providing clear and honest guidance on the best path forward for your space. Many of our clients find that bundling drywall repair with our interior painting services is the most efficient way to achieve a high-impact transformation. Don’t let a damaged wall detract from the beauty of your home. Contact us for your free drywall repair estimate and let us help you restore the integrity and harmony of your living environment.
Restore Your Home’s Aesthetic Integrity
A flawless wall is more than just a surface; it’s the backdrop to your family’s daily life. Throughout this guide, we’ve explored the essential steps for how to fix a hole in the wall Highlands Ranch residents encounter, from understanding Colorado’s arid climate to mastering the art of knockdown texture. Whether you tackle a small ding yourself or choose to partner with a professional, your commitment to home stewardship ensures your space remains a sanctuary of beauty and calm.
If you prefer to leave the dust and technical details to a conscientious craftsman, we’re ready to help. Locally owned and operated since 2020, our team specializes in “invisible” texture matching that restores your home’s original character. We provide a clean job site guarantee, ensuring your living environment remains respected throughout the process. Get your free Highlands Ranch drywall repair estimate today and take the first step toward a total home transformation. Your walls are the canvas of your home, and we’re honored to help you keep them perfect.
Frequently Asked Questions
How much does it cost to fix a hole in the wall in Highlands Ranch?
Professional drywall repair costs in Colorado typically average $32.92 per hour, plus the cost of materials. For a single small hole from a doorknob or picture frame, homeowners often pay between $300 and $500 for a professional finish. Larger repairs or complex texture matching can range from $500 to $800. We recommend checking local service listings to compare current market rates for your specific project needs and home style.
Can I fix a large hole in drywall without replacing the whole sheet?
You can repair holes larger than six inches without replacing an entire 4×8 sheet of drywall. The most reliable method involves cutting a square around the damage and installing wooden backing or “cleats” to support a new drywall segment. This technique ensures structural integrity while minimizing material waste. It’s a sustainable way to restore your home’s interior without the logistical burden of a full-scale renovation or demolition.
How do I match the orange peel texture on my Highlands Ranch walls?
Matching orange peel texture requires an adjustable aerosol texture spray and a bit of practice on a scrap piece of cardboard. Adjust the nozzle to match the density of the existing bumps on your wall before spraying the patch. Hold the can roughly 12 to 18 inches away and apply in a light, circular motion. This attention to detail is what separates a visible patch from a truly invisible repair.
Is it better to use mesh or paper tape for drywall cracks?
Paper tape is generally superior for structural cracks and corners because it provides a stronger mechanical bond. While mesh tape is self-adhesive and easier for DIYers to apply, it can sometimes stretch, leading to recurring cracks in high-stress areas. For long-lasting results in the shifting Colorado soil, paper tape embedded in a thin layer of joint compound is the professional choice for a conscientious craftsman.
Why does my drywall patch keep cracking after I fix it?
Recurring cracks often stem from the extreme temperature swings and low humidity found across the Front Range. If the joint compound dries too quickly or if the underlying house framing is still settling, the patch will eventually fail. Ensuring you use a setting-type compound and allowing for full 24-hour dehydration helps mitigate these climate-driven issues. Understanding how to fix a hole in the wall Highlands Ranch homeowners struggle with means accounting for this constant environmental movement.
How long should I wait for joint compound to dry in Colorado’s climate?
Although our dry air can make the surface feel dry in under an hour, you should wait a full 24 hours before sanding or painting. Rushing this process leads to shrinkage cracks and poor paint adhesion. In our high-altitude environment, deep moisture needs time to escape the gypsum fully. We treat this waiting period with the same discipline as the repair itself to ensure a permanent and reliable result.
Do I really need to prime a drywall patch before painting?
Yes, priming is a non-negotiable step for an invisible finish. Joint compound is highly absorbent and will soak up the moisture from your paint, creating a dull spot known as flashing. A high-quality primer seals the repair and ensures the topcoat sheen matches the rest of the wall perfectly. This extra step reflects the conscientious approach required for a professional-grade home transformation that stands the test of time.
What is the best way to fix nail pops in a newer home?
To fix a nail pop permanently, drive a new drywall screw about two inches above or below the pop to pull the board tight against the stud. Remove the loose fastener or drive it deeper before covering both spots with joint compound. This method addresses the root cause of the movement rather than just hiding it. It’s a common task when learning how to fix a hole in the wall Highlands Ranch residents often encounter in newer developments.